Wednesday, November 7, 2012

Thankful Tree


I had a bunch of this brown packaging paper from a box I got from Amazon.  I love shopping from Amazon, I get the most random stuff delivered like diapers, tampons and toys. They all come in boxes with packaging paper.  This had been sitting downstairs in a heap in a corner. I was thinking about making a large scale thankful tree and when I saw this paper I knew it would be perfect.

I decided to tape the tree to our pantry door which is just about the most used door in my house and the center of our home. Everyday we can add a few leaves that say what we are thankful for.

This is how our tree looks now. A little bare but it's growing everyday.  It's been so fun hearing all of the random sweet things Addie has to say. Some of my favorites so far are; "I'm grateful for mommy for making my lunch" and "for Gracie for giving me loves" (we call hugs loves).  I'm excited to see what else we come up with. I'll post a photo of the finished tree on Thanksgiving.

Today I am thankful for the library. Where else would I go during that last hour and half before daddy gets home, the girls are driving me crazy and we need to get out of the house?

Monday, November 5, 2012

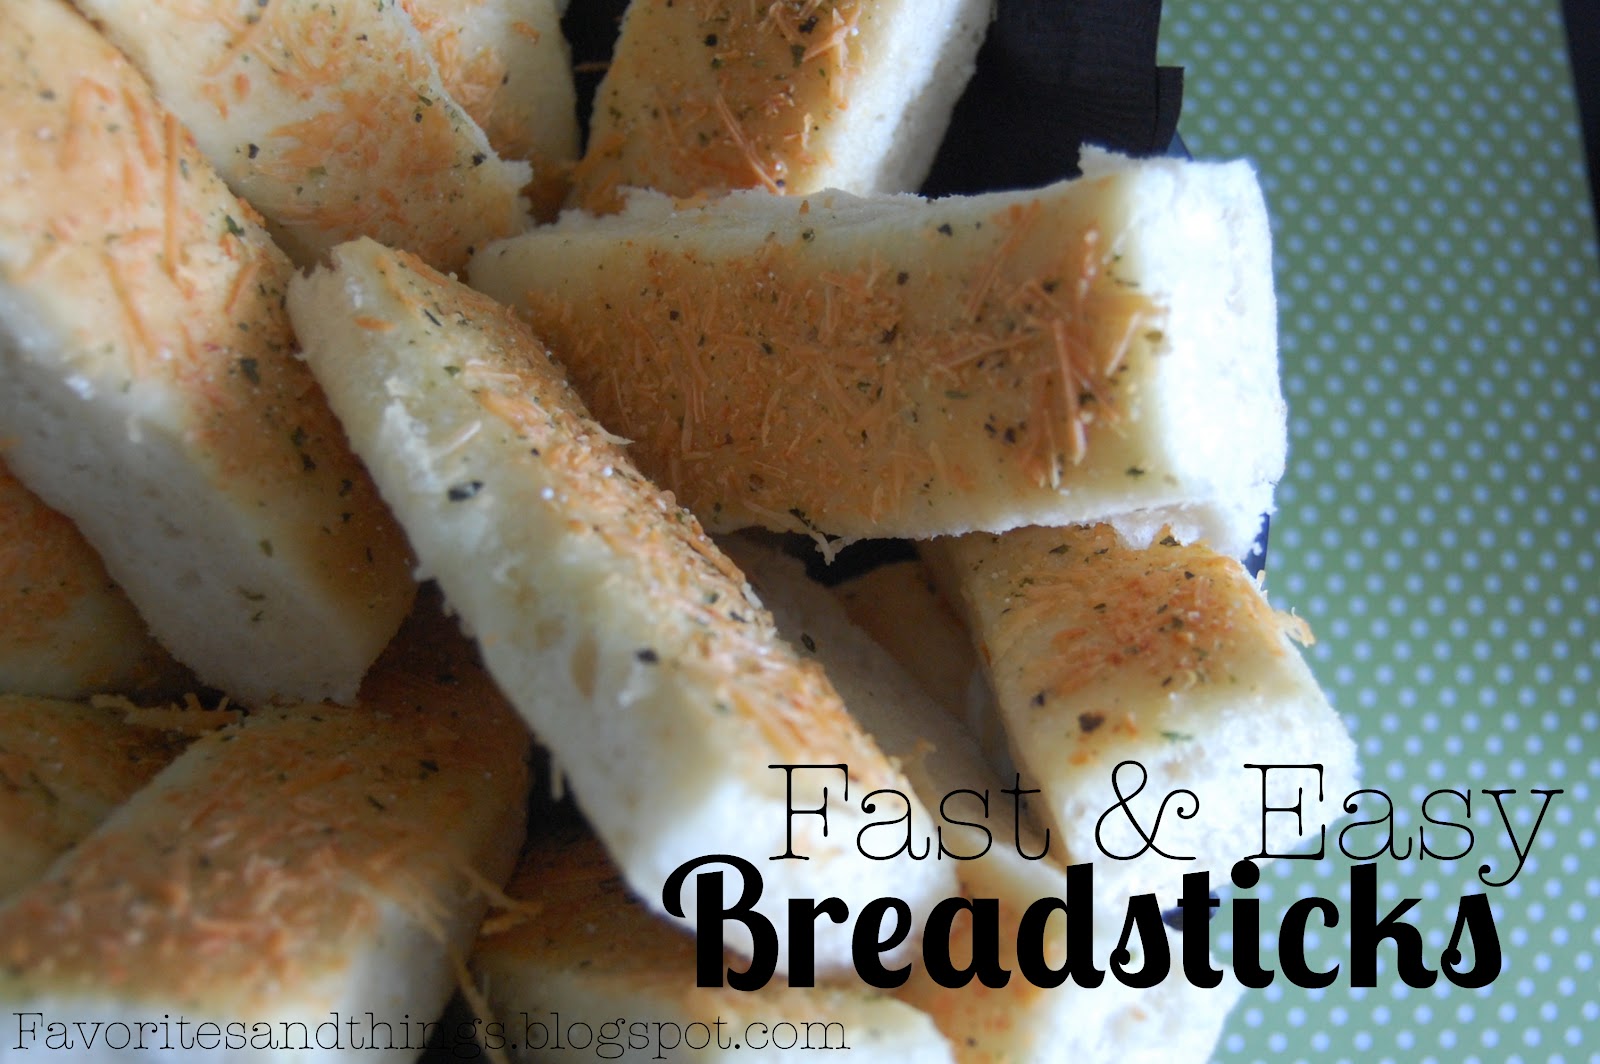
The Best Fast and Easy Breadsticks


A few months ago I was making dinner and I thought breadsticks would be a nice addition to the meal. I went to my friendly Google and searched for something like "quick and easy breadsticks". Whenever I search for anything "Fast and Easy" is almost always in the title. This recipe won out of all the other breadsticks because I didn't even have to roll anything out on my counter. I hate rolling thing on my counter, it's just another mess I don't want to clean up.

I'm so glad I tried these because not only do you not have to hand kneed them or roll them on your counter but they are delicious! Fluffy, soft and just plan good. 

The first time I made these I did not have the Johnny's Garlic Seasoning so I just sprinkled on some garlic powder and parsley. They tasted great like that but I found a bottle of the Johnny's Garlic Seasoning at Walmart which I'll be using from now on because it's simple. It all comes down to being lazy and wanting everything simple and fast! Am I the only one like that? 

Recipe from: Jamie Cooks It Up

Ingredients:

1 1/2 C warm water
2 T sugar
1 T yeast
1/2 t salt
3 1/2- 4 C flour
1/4 C butter 
3/4 C grated Parmesan or mozzarella cheese
Johnny’s Garlic Seasoning (or a combination of garlic salt and parsly) 


1. Mix the water, sugar and yeast together in a measuring cup or in the bottom of your mixer. Let it sit for 5 minutes.
2. Add the salt and the flour, one cup at a time, until it is well incorporated. Mix on high for 5 minutes. Let the dough rest for 5 minutes.                                                         
3. Melt the butter and pour half of it onto a large cookie sheet.           
4. Place the dough in the center of the pan. Let it sit for a minute or two, which will make it easier to spread out.                                                                            
5. Spread the dough flat onto the pan trying to cover most of the pan.
6. Pour on the other half of butter and sprinkle with Seasoning and Cheese.
7. Using a pizza cutter, cut the breadsticks down the middle once lengthwise and then again about 12 times the other way.
8. Put the pan into a 170 degree oven for about 7-10 minutes for the breadsticks to rise a little.
9. Leave the breadsticks in the oven and turn it up to 350 and bake for about 12 minutes once it gets to 350, or until golden brown.
10. Let them rest for a few minutes and then recut them where needed. 
For great step by step photos check the original blog post on Jamie Cooks It Up.

Thursday, November 1, 2012

Easy and Delicious Caramel Apples


We love making our own gourmet caramel apples. This is the third year our little family as made them and it gets better each time. These are the perfect fall treat because apples are in season right now, plus you can use up any leftover Halloween candy or buy more right now on clearance. 


I start by using these Caramel Bits. I know it's easy to make your own caramel sauce for dipping but these caramel bits work perfectly and all you have to do is melt them. Plus I love sneaking a few. 

Wash and dry the apples and then coat them with the melted caramel. After they are all coated put them in the fridge to chill. 

While they are chilling in the fridge I melt the Almond Bark and start crushing and mixing toppings.

When they come out of the fridge they usually have a little pool of caramel at the bottom. Just mold that back onto the apple and it's ready for the Almond Bark.


To make Apple Pie Caramel Apples mix some sugar and cinnamon together and then sprinkle it over the almond bark.


For Butterfinger Apples just crush some Butterfingers and cover the Almond Bark.


For Chocolate Swirl Apples I just melt chocolate chips and put in a ziploc bag with a hole in it and drizzle the chocolate over the apple.

We made one more flavor with crushed Oreos over the apples and it was SO good. It was gone before I could take a picture of it.  The options for these apples are endless. We've also tried coating them in mini chocolate chips, crushed snickers and toffee bits. 

Wednesday, October 31, 2012

Pumpkin Pizza


Papa Murphy's Pizza usually sells pumpkin shaped pizzas around Halloween and we usually buy one for a quick easy meal. This year we made our own and it was so easy.

 I just made our favorite pizza crust, rolled it out into a funny shaped circle and then gathered the top together for a stem.

Addie and I both decorated one. After I took this picture she decided to add another layer of sauce for the hair.


Happy Halloween!

Thursday, October 25, 2012

Healthy Halloween Snack


With all the candy and sweets around Halloween it's nice to give my kids something a little healthier but still fun and festive. I saw this cute idea on Serving Pink Lemonade and ran to the store with my little one. I told Addie I had a surprise snack for her after preschool and when she saw these she was as excited as she would have been if it was a cookie.

You could also just draw with a sharpie on the skin of a little clementine, like over on Homespun with Love. If only those were in season around here.


Wednesday, October 24, 2012

Candy Corn Sugar Cookies


Aren't these cookies adorable? I saw them on a wonderful recipe blog called High Heels and Grills and knew immediately I had to make them. The recipe is just the basic sugar cookie bars with the addition of some yellow and orange food coloring. Which make them a perfect Halloween treat. 


Cookies:
  • 1/2 cup salted butter, softened
  • 1 cup white sugar
  • 1 egg
  • 1 1/2 T. sour cream
  • 1 tsp. vanilla extract
  • 2 1/2 cups all-purpose flour
  • 1/2 t. baking powder
  • 1/2 t. salt
  • Orange and yellow food coloring

Frosting:
  • 4 cups confectioner's sugar
  • 1/2 cup salted butter, softened
  • 3-4 T. of milk
  • 1 tsp. vanilla extract {I used clear vanilla, so the frosting would be more white, but any kind works}
  • A pinch of salt

Directions:
  1. Preheat oven to 375°F and grease a 9x13 inch baking dish.
  2. In a large bowl, cream together butter and sugar until light and fluffy, about 3 minutes.
  3. Add egg and combine well.
  4. Add sour cream and vanilla and mix until completely combined.
  5. Slowly add the flour, baking powder and salt to the wet mixture and stir until well combined.
  6. Color all of the dough yellow and remove half.
  7. Press one half of the yellow batter into the dish, it will not seem like enough dough but just keep squishing it down.
  8. Add orange food coloring to the rest of the yellow dough.
  9. Spread the orange batter out, I broke of the orange batter into globs and then smooshed them all together. 
  10. Bake for 17-20 minutes
  11. Set aside to cool completely.
  12. FOR THE FROSTING: In a medium bowl, cream powdered sugar, butter and milk until light and fluffy.
  13. Stir in vanilla and salt and combine well.
  14. Frost your cooled cookie bars evenly.
  15. Cut into triangles and serve.
Recipe adapted from: High Heels and Grills

Of course this is how Addie's cookie turned out. Can't eat a cookie without some sprinkles. 


These are a perfect easy treat to take to neighbors and friends. I found this cute Spider You've been Booed! at Grey Square Designs. They have a free printable you can download.


Monday, October 22, 2012

Easy Fall Bouquet


The tree in my front yard is looking like this right now. It makes me almost forget how messy this tree is. I love to cut off some of these branches and put them in a vase. It makes a beautiful and free fall bouquet. 

                      
Make sure you rinse off the branches when you bring them in the house. I did this a few weeks ago and found a lovely spider crawling around my piano where I put the vase and I am NOT a fan of spiders.

Thursday, October 18, 2012

Mummy Cups with Peanut Butter Popcorn


I saw some mummy cups like these in a magazine but they used fabric for the strips. I thought gluing on paper strips would be just as cute and so cheap because we already had all of the supplies.


All you need is:
  • Paper ripped into strips
  • Glue
  • Pastic or paper cups
  • Goggly Eyes
Put some glue on the cups and just start glueing the paper onto the cups. Try to cover all of the cup leaving no holes. Once it's covered glue on the eyes and fill them with whatever you like. 


This was such a fun easy craft to make and would be adorable as a little party favor or a treat for someone just wrapped up in cellophane and tied with a bow. I would have done that if I had any cellophane.

My girls loved making these too, this is how my 4 year olds turned out. She says it looks spooky.


We filled ours with Peanut Butter Popcorn which is one of our favorite snacks for movie night or game night. It is super simple to make and so addictive. Once you start eating it, you'll never stop. 


Peanut Butter Popcorn

1/2 c. Light Corn Syrup
1/2 c. Sugar
1/2 c. Peanut Butter
1 t. Vanilla
6 - 8 c. Popped Pop Corn (about 1/2 c. un poped corn)

1. Mix corn syrup, sugar and peanut butter over medium heat just until the sugar is dissolved.
2. Take off heat and add the vanilla.
3. Stir in the Popcorn and eat! Watch out, it's HOT for a few minutes.                     


Wednesday, October 17, 2012

Pumpkin Chocolate Chip Muffins


I love all things pumpkin flavor, except pumpkin pie. Strange I know. Anyway, these are my go to pumpkin chocolate chip muffin and my favorite muffin of all time.  I love them because they are easy to make, taste devine and they use the whole can of pumpkin puree. No more trying to figure out what to make with the rest of the can.

I found this recipe one day when I googled healthy chocolate chip muffins, I don't think these are necessarily healthy but they have become my tried and true recipe. We are lucky if these last longer than one day, my whole family can not stop eating them. I also add about a 1/2 cup of chocolate chips in mine because everything is better with chocolate. 


INGREDIENTS:
1 ½ cups all-purpose flour or 1 ½ cups whole wheat flour (or the white/wheat blend)
1 teaspoon baking powder
1 15 ounce can solid-pack pumpkin (yes, dump in the whole can)
1/3 cup canola oil
2 large eggs
1 teaspoon cinnamon or pumpkin pie spice
½ teaspoon cloves
½ teaspoon nutmeg
1 cup sugar
½ teaspoon baking soda
½ teaspoon salt
1/2 chocolate chips

Topping:
1 tsp cinnamon
1 tablespoon sugar


DIRECTIONS:

Put oven rack in middle position. Preheat oven to 350F. Put liners in muffin cups or spray with non-stick cooking spray.
1. Whisk together flour and baking powder in a small bowl.
2. Whisk together pumpkin, oil, eggs, pumpkin-pie spice, cloves, nutmeg, 1 cup sugar, baking soda, and salt in a large bowl until smooth, then whisk in flour mixture until just combined.
3. Stir together cinnamon and remaining 1 tablespoon sugar in another small bowl.
4. Divide batter among muffin cups (each should be about 3/4 full), then sprinkle tops with cinnamon-sugar mixture. Bake until puffed and golden brown and a wooden pick or skewer inserted into center of a muffin comes out clean, 25 to 30 minutes for regular muffins, 15-17 minutes for mini-muffins.

Cool in pan on a rack 5 minutes, then transfer muffins from pan to rack and cool to warm or room temperature.

Source: Slightly adapted from: Healthy Diet Mom

LinkWithin

Related Posts with Thumbnails